Remember my thrift store lamp turned perfect reading lamp for my son’s room? Here it is:

I loved it! You gave me great feedback about it! It’s awesome, right?
My son hated it.

Why?
First he said it was too bright. Fine, I said – we’ll put in a lower wattage light bulb. Problem solved.
Then he said that he missed his old lamp, which had a sports theme (like the rest of his room).

OK, that’s fair. He wanted a sports lamp shade. I couldn’t just swap the shades, because the old lamp shade was so much smaller. And I couldn’t return the green and blue one to the store. I had to recover it instead.
So, off to the fabric store I went.
Lucky for him me, I found the perfect fabric and it was on sale for 50% off! That made it $2.99/yard! Woot!

You can find all kinds of tutorials for recovering lamp shades on Pinterest. After reviewing my research, here’s how I did it:
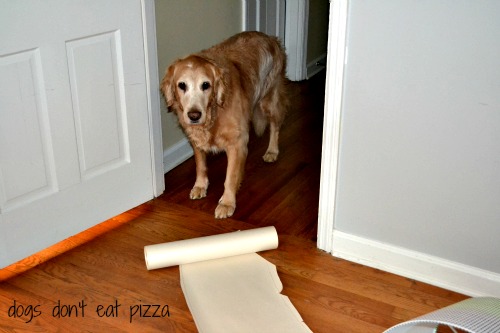
First, I measured the lamp shade. I did this by tracing the shade (marking the edges with a pencil as I rolled it on the paper) on a roll of craft paper. I added about a half inch to both sides, so the fabric would wrap around the shade.

Hank supervised.
I cut out the template from the craft paper and laid it on the back side of the fabric. I then traced around it.

Then I cut out the fabric along the lines I traced. Next, I ironed the fabric.

I then took the ironed fabric outside and sprayed it with spray adhesive. I didn’t take pictures of this because (a) it was all I could do not to knot up the fabric once I had sprayed the adhesive on it (it gets quite sticky – hence the name) and (b) it was rainy and kind of dark in the garage. Trust me, I sprayed it.
Let me offer a few tips about spraying the fabric with spray adhesive:
(1) Do it outside, preferably on a tarp or drop cloth. The adhesive sticks to everything (again, hence its name) and you don’t want to do this inside. Also, it does have a strong smell, so outside is best.
(2) The fabric, once sprayed, gets very tacky. It will stick to itself and this will be annoying. Trust me.
(3) Have the lampshade close by to avoid problems caused by #2.
OK, so I brought the fabric in and wrapped it carefully around the shade. Make sure to smooth out the fabric and get rid of any wrinkles as you go. You can use a scraper or credit card for this, or just use your fingers.
For the seam (where the two fabric edges meet), fold over the top edge so that you have a smooth edge and then glue it down with fabric glue or a hot glue gun.
You should have some overhang of fabric (that half inch, mentioned above) on the top and bottom of the shade. To make sure the edges of the fabric adhered to the shade, I ran a line of fabric glue around each edge of the shade and then folded the fabric over. (Alternatively, you could do this with a hot glue gun.) Once the edges are adhered, trim off any excess.

And voila! I recovered the shade.

Here it is in his room:

Admittedly, you can still see the square print from the original lampshade through this fabric when the lamp is on, but it looks like the bumps (that’s the technical term) on a football or basketball, so it’s not too bad. If I were being a perfectionist about it, I would have added another layer of fabric over the first one to cover the underlying pattern.

And what did my son say about the “new” lamp?
He loved it!
VICTORY!
Wahoo!
Yeehah!
Happy dance!
Thanks for stopping by! Happy Monday, y’all!


Leave a comment