Dogs Don't Eat Pizza

Formerly The DIY Bungalow

  • Home
  • About
    • About Karen & the Blog
    • Thirty Days of Gratitude
    • Habitat for Humanity ReStore Workshops
    • Stories from the Bungalow
    • Dogs Who Don’t Eat Pizza
      • Bear, the Original Dog Who Didn’t Eat Pizza
      • Hank Dog
      • Elvis Parsley
  • Project Index
    • DIY
    • Decorating
    • Shopping Tips
    • Repurposing and Upcycling
    • Paint and Color
    • Organizing
    • Cleaning
    • Recipes
    • Gardening
    • Holidays & Seasonal
    • Friday Five
  • Home Tour
    • The 1929 House
    • The First House
    • Room Reveals
  • Advertising
    • Disclosure and Privacy Policy
    • Advertising
  • Media
  • Contact
You are here: Home / Quick Room Updates / From Beige to Bright: Our Entry Hall and Stairs

From Beige to Bright: Our Entry Hall and Stairs

September 12, 2012 By Karen Cooper 6 Comments

As you may remember from this post, I wanted to make our entry hall and stairs less, well, boring.  It was so beige.  Blah. Yawn. Boorrrrring.  Here is a picture of what it looked like before:

Beige boring entry way - thediybungalow.com

It just screams “blah.”

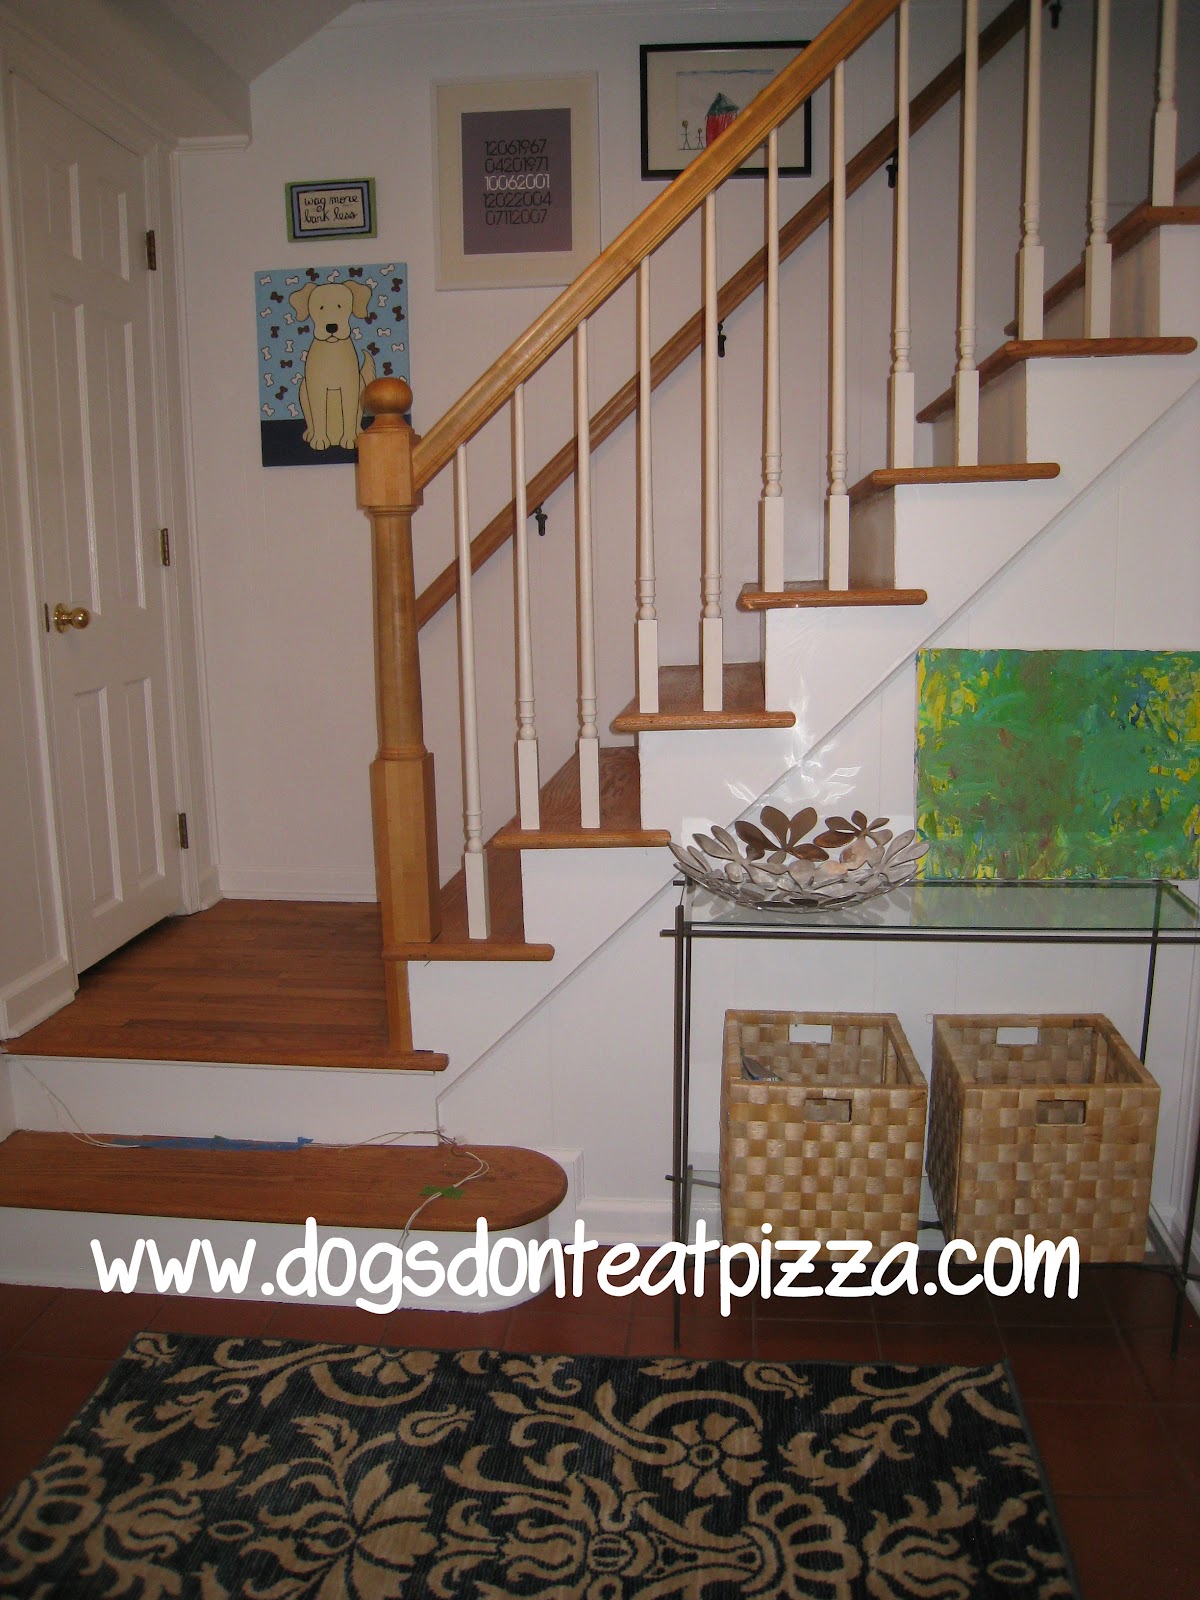
Here’s what it looks like now:

entry with color - thediybungalow.com

Whaddaya think?  It is so much brighter…much more welcoming when you come in the house.

So, what did I do?

stairs at entry way - thediybungalow.com

First, I painted the walls bright white.  I used Benjamin Moore, Pearl Finish, White.  The walls are actually wood paneling under there (blech), so I treated it like wainscoting.   I painted the stair risers the same color, once I took the carpet off the stairs.

Ah, the carpet.

Originally, I was not planning to take the carpet off the stairs.  But then I noticed how easily it came up in some places, and how it was totally not attached on the top landing, and I thought, “Hey, why not?  How hard could it be?”

Famous last words.

First of all, I have never seen so many staples holding down anything in my whole life. There were parts of the carpet coming up, so those were easy to remove.  But other parts literally had to be removed with a pry bar.  No, I’m not kidding.

These are the tools I used to pull up the carpet and the ONE MILLION staples holding it to the stairs (in addition to the pry bar):

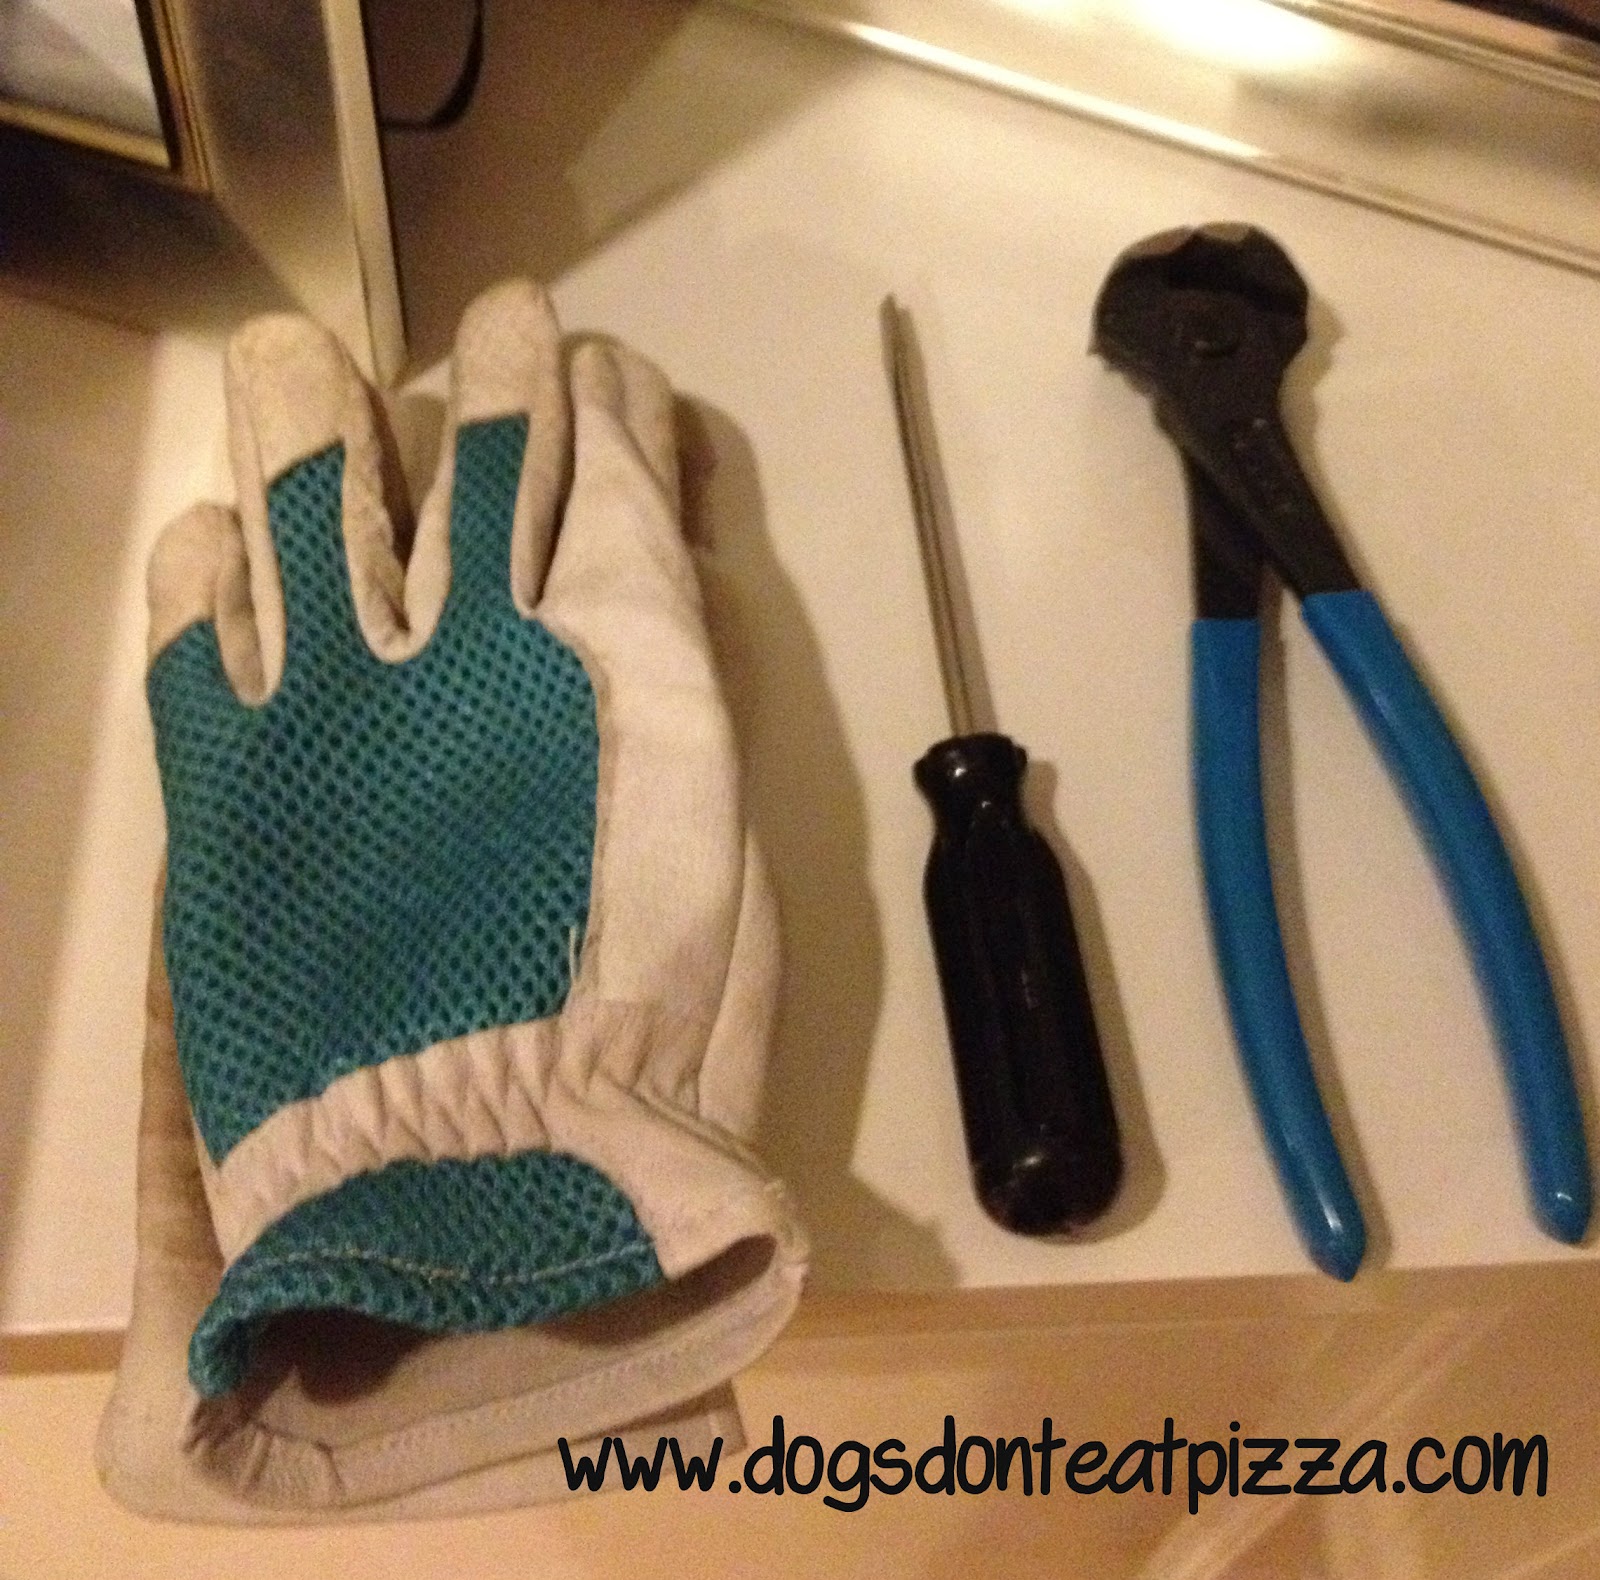
Lemme tell ya – these are a carpet-pulling-up girl’s best friend.  The most helpful of the three was the pliers on the right, called “cutting pliers,” I think. I call them rock ‘n roll pliers, because they grab the staples and you can rock them back and forth using the rounded head to get them out.  They rock! (Ha! Carpet humor.)

Second, the carpet was FILTHY.  Really, really dirty and gross.  Every time I pulled the carpet off a stair, I vacuumed, because there was so much dust and dirt.  I sneezed through the whole process.  Buy stock in Benadryl now, people, cuz we all needed a lot of it with this project and the associated dust!

Should I have removed the carpet first and then painted?  Why, yes. Of course.  But the problem was that I didn’t really think I was going to remove the carpet until after I painted and saw how dingy it looked next to the bright walls.

After removing the carpet and doing a significant amount of clean up, I finished painting the risers, touching up the walls, and painting the trim.

Then I hung up some art.  From left to right, the first painting is of the Dog Who Doesn’t Eat Pizza, Bear.  My brother gave that to me for Christmas one year, and it was painted by a local artist.  Above it is a painted plaque from the Scott Antiques Market that says “Wag More.  Bark Less.”  Amen to that.

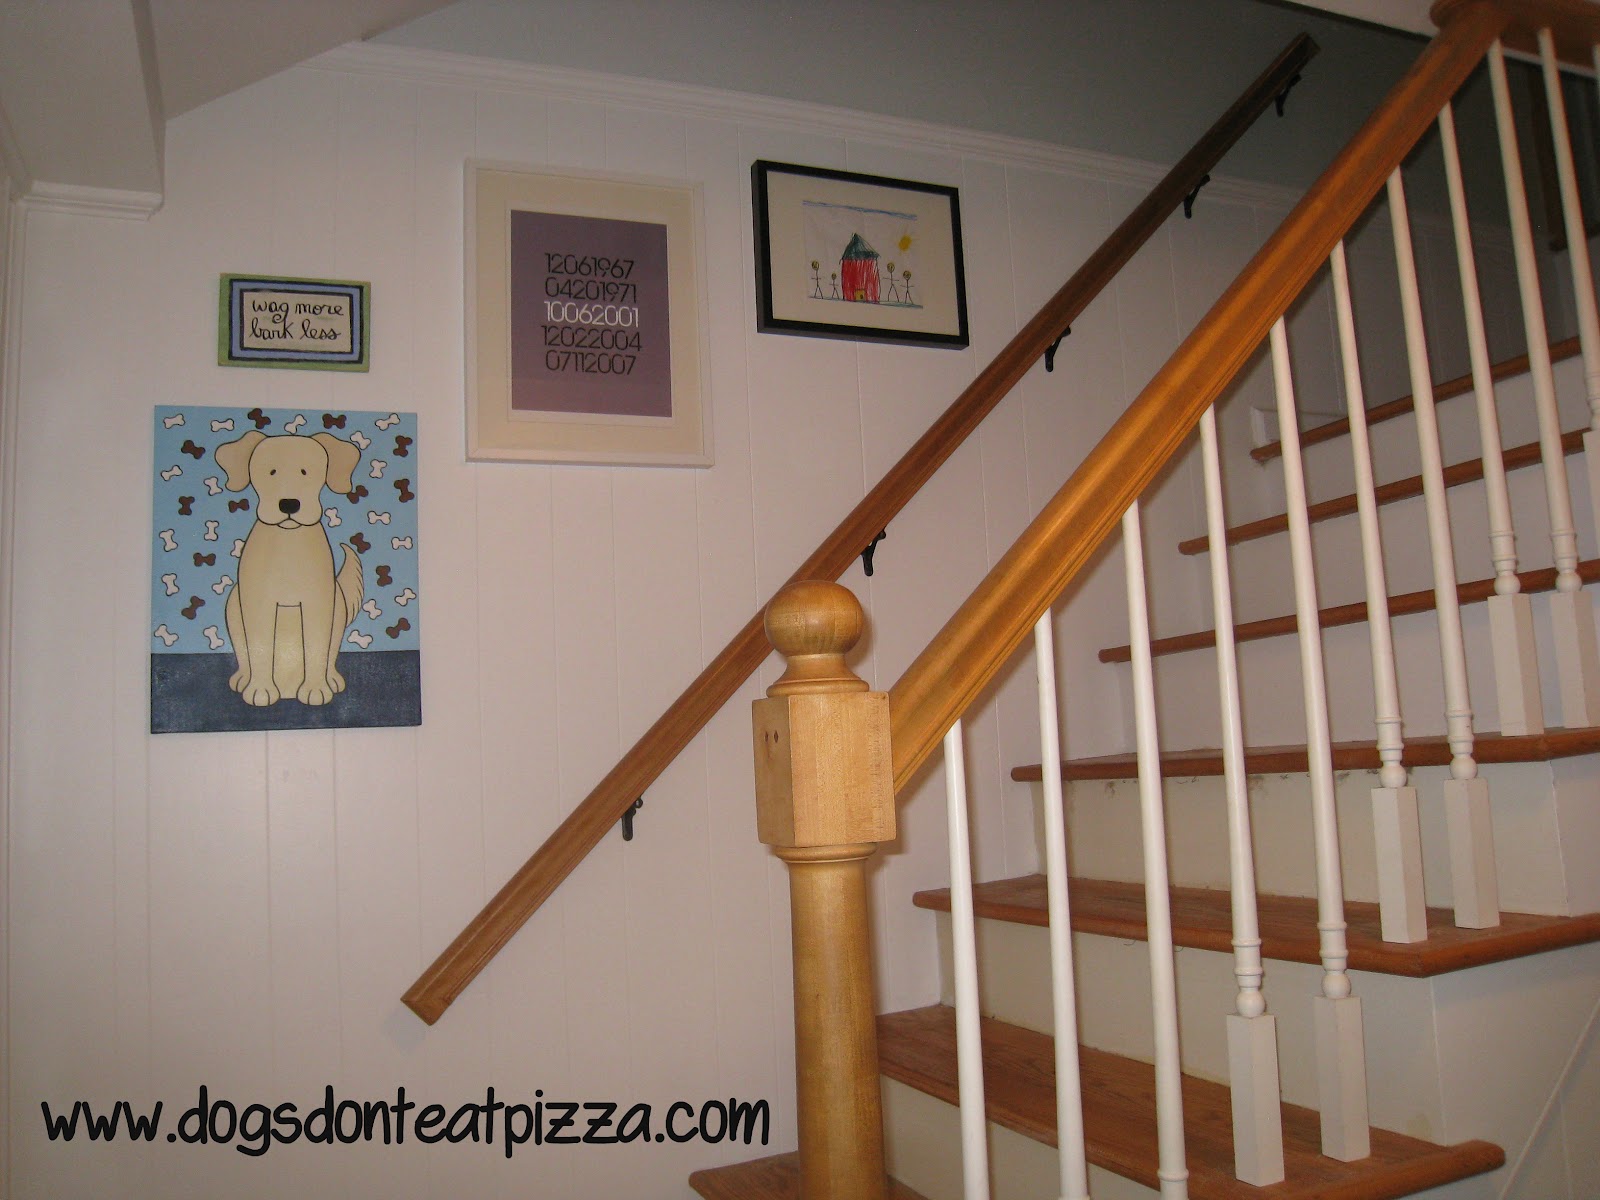
In the above picture, you can also see the banister hardware, which I spray painted Oil Rubbed Bronze (Rustoleum spray paint).  I’m going to do the same thing to the coat closet hardware and front door hardware, too.

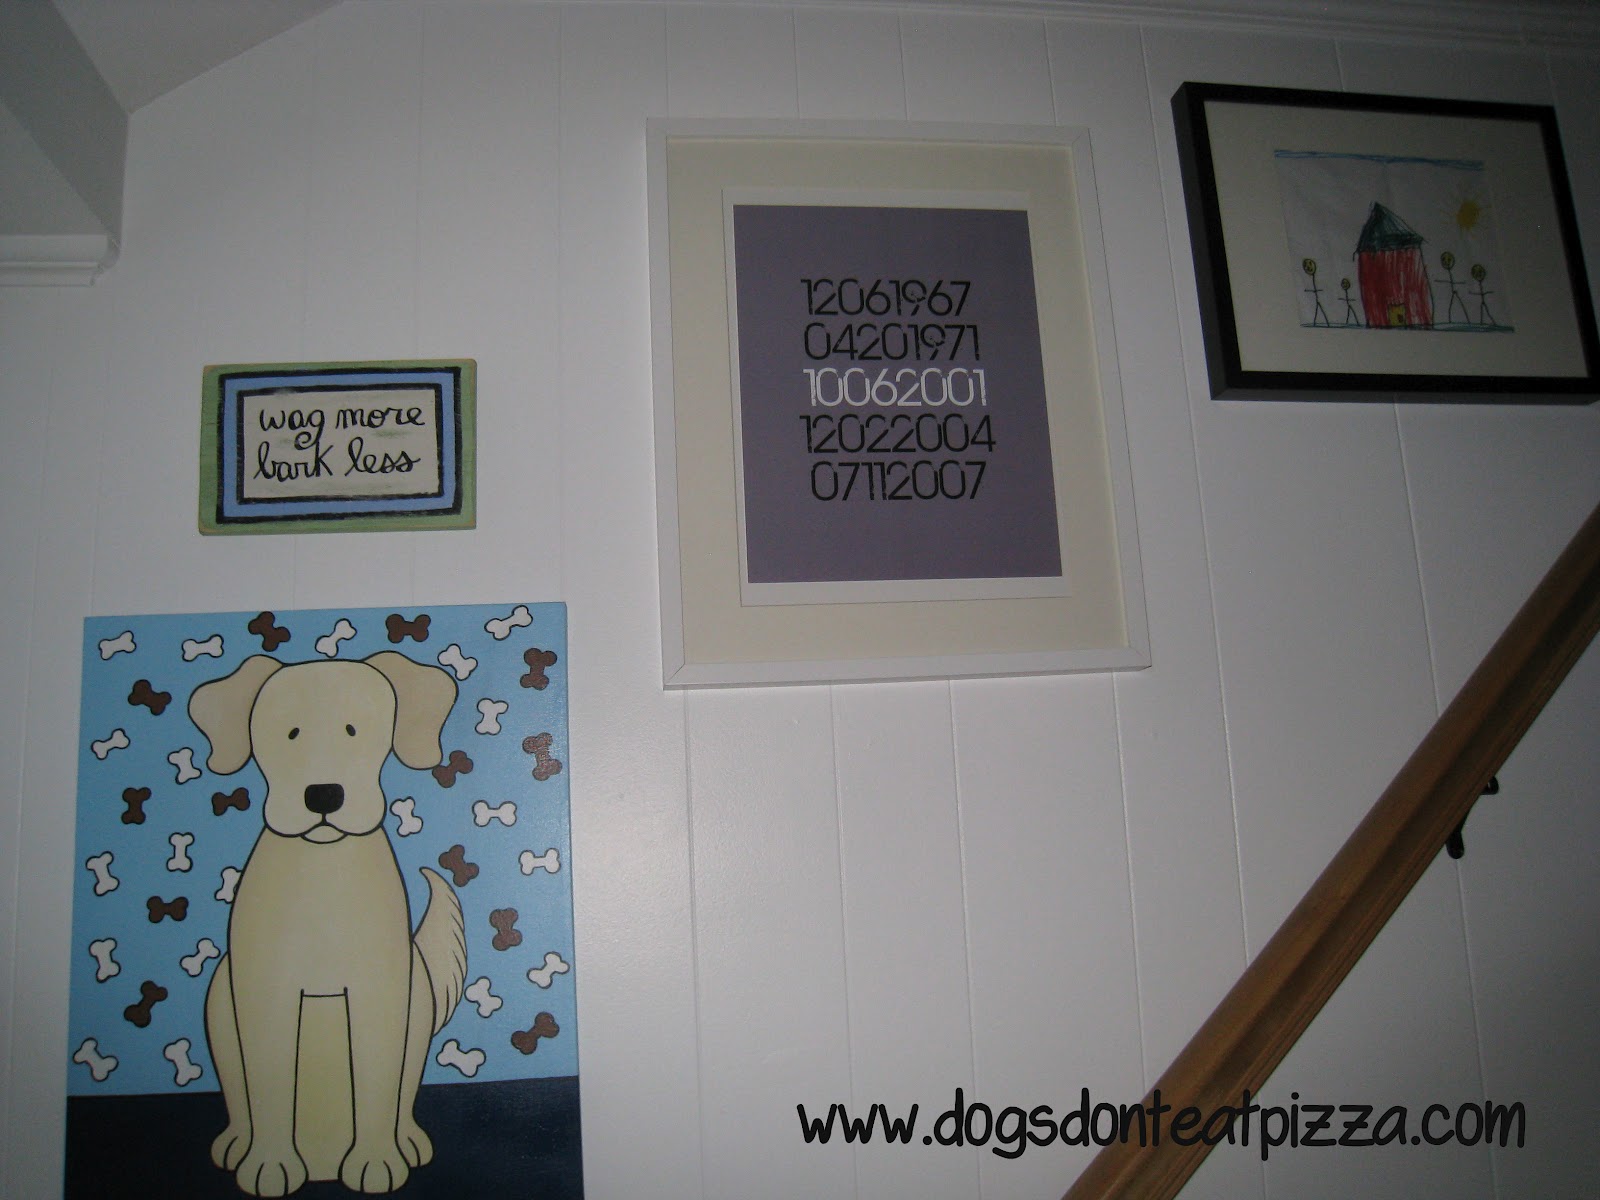
Next is a graphic I ordered from Zazzle.com.  It’s all the important dates in our family’s lives.  I love it because it just looks like a bunch of numbers, but we know the significance of them.  Plus, you know I have a thing for typography and numbers, right?

On the far right is a picture Dylan colored when he was in preschool.  It’s our home and family.  I just love it.
Lastly, I added our new rug.  Because I entered the “30 Days, 30 Bloggers” contest by Shaw Floors, Shaw sent me this beautiful new area rug.  I love the blue color and the design, and it’s the perfect size for this area.
Also, Hank (our other dog, who knows not about pizza) loves it.
So, there’s our new entry way and stairs.  I think it’s so much brighter and happier.

You might also like:

  • Slipping on Stairs: Carpet ConundrumSlipping on Stairs: Carpet Conundrum
  • Bare Stair Problem Solved!Bare Stair Problem Solved!
  • Pops of Color (or, why I love paint)Pops of Color (or, why I love paint)

Filed Under: DIY, Quick Room Updates 6 Comments

About Karen Cooper

Hi! I'm Karen. I call myself a “recovering lawyer” - I traded in my power suits for power tools and a life of DIY adventures. Join me for DIY, home decorating, repurposing and upcycling, and organizing projects and tips as I transform a 1929 Tudor bungalow into our home. I believe in merging old and new to make a house a home.

« The Finished Kitchen Renovation
Finish It Friday: The Garage »


Comments

  1. Anne says

    September 12, 2012 at 1:36 am

    Nice job! I hate carpet, ever since I discovered how filthy carpet really is after it’s been around for a little while. and there is no way to clean it well when it’s fixed in place like wall-to-wall. Only rugs for this girl!! and I love the rug your dog is sleeping on, too!

    Hope you’re enjoying standing up again. xox

    Reply
    • Karen Cooper says

      September 12, 2012 at 1:46 am

      Thanks, Anne! I am happy to report that, now, we only have area rugs, too, except in our basement, and that carpet is relatively new. Since we all are so allergic to everything, it helps not to have all that carpet holding in dust and Lord knows what else.
      Yes, my back is thanking me for being done with this project. Whew. Also, the ice cream helped!
      Thank you again. xox

      Reply
  2. Cynthia at Flotsam of the Mind says

    September 12, 2012 at 1:45 am

    Huge improvement! Bravo.

    Reply
    • Karen Cooper says

      September 12, 2012 at 1:47 am

      Gracias, friend.

      Reply
  3. Thrifty Crafty Girl says

    September 12, 2012 at 1:47 am

    I love how bright it is! You did a great job… it looks like you worked so hard, you tuckered the dog right out. 🙂

    Reply
    • Karen Cooper says

      September 12, 2012 at 2:47 am

      Thank you! Yes, he was very tired from all of my hard work. Actually, on Saturday night, I stayed up painting until about 1 AM, and he kept looking at me like, “Can we go to bed yet? How about now? Pretty please???” It was pathetic.

      Reply

Leave a Reply Cancel reply

Your email address will not be published. Required fields are marked *

This site uses Akismet to reduce spam. Learn how your comment data is processed.

Hi! I’m Karen. I call myself a “recovering lawyer,” because I turned in my power suits for power tools and a life of DIY. This blog is all about DIY, home decorating, repurposing and upcycling, and organization. I believe in merging old and new to make a house a home.


find projects here!

My Daybed in This Old House Magazine!

Daybed from Old Doors featured in This Old House Magazine
Best of 2016 - Best Blog DIY Category - thediybungalow.com

Disclosure

Dogs Don't Eat Pizza is a participant in the Amazon Services LLC Associates Program, an affiliate advertising program designed to provide a means for sites to earn advertising fees by advertising and linking to Amazon.com.  Dogs Don't Eat Pizza also participates in other affiliate programs.

To see my complete disclosure and privacy policy, click HERE.

About Karen

A "recovering lawyer," I turned in my power suits for power tools and a life of DIY. I believe in merging old and new to make a house a home. Read More…

  • Email
  • Facebook
  • Instagram
  • Pinterest
  • Twitter
© Copyright 2012-2020, Dogs Don't Eat Pizza, LLC (formerly The DIY Bungalow LLC).
This site uses cookies; continuing means you're cool with that. Find out more here.