The kitchen is DONE. No, really, it is done. I promise. I double pinky swear. Done. The gray trim is GONE. The kitchen, take 2 – white trim edition – is ready for her close-up!

Have I mentioned how much I didn’t like the gray trim? ‘Cuz I really didn’t like the gray trim. Here’s the BEFORE pic (or at least the first “after” pic, after taking down the high upper cabinets, as explained HERE):


I washed that gray right outta the trim! I also painted the walls Benjamin Moore’s “Decorator’s White,” which is a bright white with gray-blue undertones. The walls were Sherwin Williams’ “Incredible White,” which looked dingy, especially next to the bright white trim.

Now the white $12 porcelain cast iron sink (from the Atlanta Habitat for Humanity ReStore) really shines against the white trim.

I kept the shelves (see the post on my first kitchen redo HERE) and Coke crate spice rack (post on how to create a Coke crate spice rack HERE).

I did move the dishes from the breakfast room back to the kitchen.

As I explained in THIS POST, I hung the shelves too high the first go-round. I lowered them all around the kitchen to the standard, 18 inches above the counter, height. And, once I lowered them, the kids could reach the dishes on the bottom shelf! Win!

I added some farmhouse-style touches, like this wire basket with vintage rolling pins, and the “Breakfast” sign (secret: I got the sign at a thrift store for 50 cents!).

Now the cooking utensils are hanging above the stove, rather than taking up valuable real estate on the counter. I like that better.

I still have an area designated for my favorite beverage: coffee! The mugs are on the shelf right above the coffee maker, making everything within reach of the coffee pot. Perfect for when I’m not so awake (i.e., every morning!).
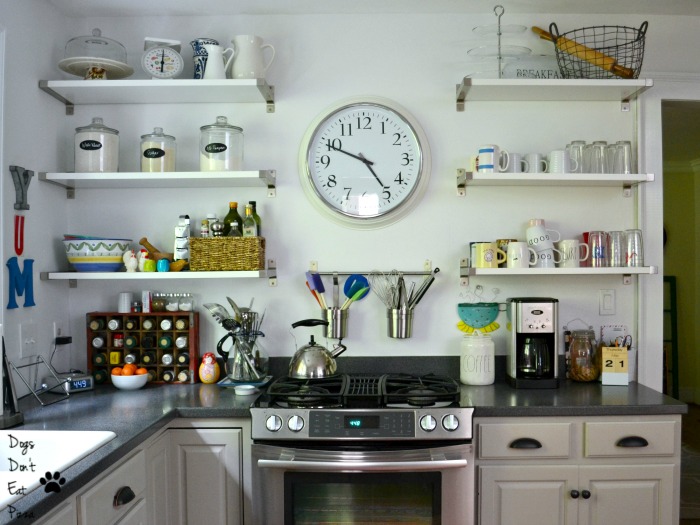
I’m just so happy that the trim now is bright and crisp-looking, and matches the trim in the rest of our home.
Yes, the cabinets are still gray, but they’re going to stay that way until we replace the cabinets completely. I just can’t invest the time and money in painting them when they aren’t in good shape to begin with.
So, just to review the big to-do list for the kitchen and laundry room, with what’s done crossed off:
Clear off shelves in kitchen and remove from walls. Why? Because I’m going to paint the walls and ceiling, too, while I’m at it. I decided to paint the walls Benjamin Moore Decorator’s White, which is a bright white with some gray that will complement the gray cabinet paint.Take down pantry sliding door (required to paint door frame) and patch pantry door frame (from where old doors were).Sand trim in kitchen and laundry room.Sand chalkboard paint backsplash. I know – I like the chalkboard paint backsplash! But I’m going for a lighter look in the kitchen, so – I think – I’m going to cover the dark chalkboard paint. I have plenty of chalkboards elsewhere, honest.NOTE: I haven’t decided for sure that I’m going to cover the chalkboard paint backsplash. On the one hand, I like it. On the other, it’s dark. We’ll see. (Opinions welcomed below in comments!)
Prime trim (this is a third of the way done) and chalkboard paint on wall.Paint the kitchen ceiling. Why? Because the ceiling is darker where the upper cabinets used to be and I want it to look clean and even.Paint trim – Benjamin Moore semi-gloss in white. I have already done a third of the kitchen trim and the pantry door frame.Paint walls –Laundry room: Violet Sparkle by Benjamin MooreKitchen: Decorator’s White by Benjamin Moore.
Finish laundry room:Install countertop above machines.- Install tile backsplash on back wall behind machines. – I decided not to do this, at least for now.
Put it all back together.- Sand down and repaint the doors.
BOOM! One last thing to do, and that’s sand and repaint the laundry room doors. Almost there!
I love the brighter, cleaner-looking kitchen. It’s amazing how much a dark color on the trim changes the tone of the room. Lightening it up with bright white paint was the right decision, and I love it every day. Plus, I improved some other things about the kitchen, such as storage, shelf height, and organization (more about organization later – working on a separate post on that!), that makes such a difference in using the kitchen every day.
What do you think?
Linked up and featured at:

Thanks for stopping by!


Leave a comment