Dogs Don't Eat Pizza

Formerly The DIY Bungalow

  • Home
  • About
    • About Karen & the Blog
    • Thirty Days of Gratitude
    • Habitat for Humanity ReStore Workshops
    • Stories from the Bungalow
    • Dogs Who Don’t Eat Pizza
      • Bear, the Original Dog Who Didn’t Eat Pizza
      • Hank Dog
      • Elvis Parsley
  • Project Index
    • DIY
    • Decorating
    • Shopping Tips
    • Repurposing and Upcycling
    • Paint and Color
    • Organizing
    • Cleaning
    • Recipes
    • Gardening
    • Holidays & Seasonal
    • Friday Five
  • Home Tour
    • The 1929 House
    • The First House
    • Room Reveals
  • Advertising
    • Disclosure and Privacy Policy
    • Advertising
  • Media
  • Contact
You are here: Home / DIY / This is a Hold Up! (or, how to use belts to fix a sagging table top)

This is a Hold Up! (or, how to use belts to fix a sagging table top)

June 13, 2013 By Karen Cooper 8 Comments

So this project wasn’t on my to-do list, but it’s been bothering me.  I had to fix it.

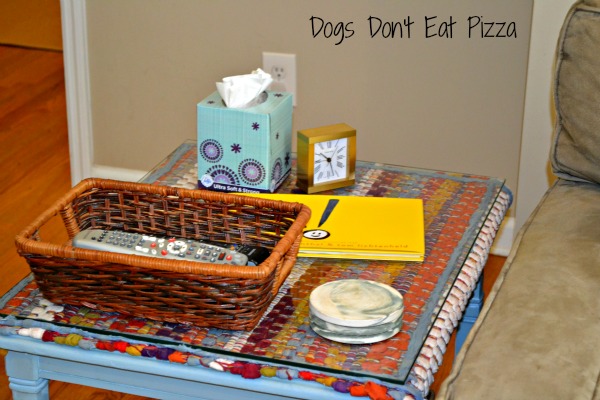
Remember my cute little curbside find table?

finished table side view

Notice how the rug top is sagging a bit?

Well, it turns out that the rug, given its weight and the pliability of the fabric, was sagging. The dip didn’t affect the function of the table, since I added a glass top. But the little bow in the fabric was bothering me.

I had to think of a solution that wasn’t expensive but would hold up the rug top.

BELTS!

I went to my local thrift store on its half-price day (wahoo!). I found a few options, but chose one solid belt ($4.99 minus half) and one woven belt ($3.99 minus half). The belts don’t have to match, given that they’re going to be under the rug and not visible.

Here are the tools I used:

Tools Needed

The staple gun I used to attach the rug top wasn’t strong enough to get through the belts. Enter new nailer!

Yes, I finally broke out the nailer and used it! And no one got hurt! VICTORY! (I’m very excited!)

First, I turned the table upside down.

underside of table

Then, I added the first belt. I didn’t cut it to size first; I wanted to see how much I needed, and figured I’d cut it when it was all fastened to the table.

I attached them to the table top, both on the side of the frame and top:

belts to supportAnd voila!

Look ma! I'm level!Ah, nice and flat.

All that I had to do was add back the glass top and all the stuff we’ve put on this table. Now, it’s the perfect side table for our couch.

finished table with glass top

I thought about it, and the rug/fabric could always be changed out. It’s only attached with staples, so it could certainly be replaced with a little elbow grease.

For example:

other options

Just something to think about for the future.

You might also like:

  • One Table, Three Ways
    One Table, Three Ways
  • From Curbside Castoff to Little Farm Table
    From Curbside Castoff to Little Farm Table
  • Giving Weight to Furniture
    Giving Weight to Furniture

Filed Under: DIY 8 Comments

About Karen Cooper

Hi! I'm Karen. I call myself a “recovering lawyer” - I traded in my power suits for power tools and a life of DIY adventures. Join me for DIY, home decorating, repurposing and upcycling, and organizing projects and tips as I transform a 1929 Tudor bungalow into our home. I believe in merging old and new to make a house a home.

« Planning Our Vegetable Garden: Step One
After the Rains »


Comments

  1. Holly says

    June 13, 2013 at 8:11 pm

    That’s what I call thinking outside the box! Great idea to fix the table… I would have never thought of it!

    Reply
    • Karen Cooper says

      June 13, 2013 at 9:06 pm

      Thanks, Holly!

      Reply
  2. kristin says

    June 14, 2013 at 12:05 pm

    What a fabulous idea! Love the table too
    XO

    Reply
    • Karen Cooper says

      June 14, 2013 at 2:53 pm

      Thanks, Kristin! It was fun to make!

      Reply
  3. Sharon says

    June 20, 2013 at 10:12 pm

    Very clever!

    Reply
    • Karen Cooper says

      June 20, 2013 at 10:26 pm

      Thanks, Sharon!

      Reply
  4. Denyse @ Glitter, Glue & Paint says

    June 21, 2013 at 10:45 am

    Well aren’t you clever, Karen!

    Reply
    • Karen Cooper says

      June 21, 2013 at 8:08 pm

      Thanks, Denyse!

      Reply

Leave a Reply Cancel reply

Your email address will not be published. Required fields are marked *

This site uses Akismet to reduce spam. Learn how your comment data is processed.

Hi! I’m Karen. I call myself a “recovering lawyer,” because I turned in my power suits for power tools and a life of DIY. This blog is all about DIY, home decorating, repurposing and upcycling, and organization. I believe in merging old and new to make a house a home.


find projects here!

My Daybed in This Old House Magazine!

Daybed from Old Doors featured in This Old House Magazine
Best of 2016 - Best Blog DIY Category - thediybungalow.com

Disclosure

Dogs Don't Eat Pizza is a participant in the Amazon Services LLC Associates Program, an affiliate advertising program designed to provide a means for sites to earn advertising fees by advertising and linking to Amazon.com.  Dogs Don't Eat Pizza also participates in other affiliate programs.

To see my complete disclosure and privacy policy, click HERE.

About Karen

A "recovering lawyer," I turned in my power suits for power tools and a life of DIY. I believe in merging old and new to make a house a home. Read More…

  • Email
  • Facebook
  • Instagram
  • Pinterest
  • Twitter
© Copyright 2012-2021, Dogs Don't Eat Pizza, LLC (formerly The DIY Bungalow LLC).